
First Time Use

Here you will find all the Groundhawk basics and prerequisites to be able to utilize Groundhawk to its fullest

STEP 1

Handling Groundhawk

Watch a short video and learn how to work with Groundhawk on the field.

STEP 2

Connecting to GPS

Watch a short video and learn how to form a GPS connection smoothly with these tips.

STEP 3

Mapping

Watch a short video and learn how to use these pointers to start mapping with Groundhawk.

Prerequisites

Select the topic from list and get ready to learn more.

Getting Credentials
Contact your internal Groundhawk Administrator or support@groundhawk.io  
Provide: 
  • Full Name 
  • Email Address 
  • Company 
  • Your role (field user, project manager or documenter) 
Setting Up SIM Card

Please ensure that the device has a SIM Card with dataplan ready to be used and set-up.  

  • A normal SIM card with basic data plan is sufficient. A prepaid SIM also works. Consider that the mobile network works in the area of the site. 
  • It is suggested to remove the SIM cards of PIN request at startup in device settings to avoid confusion and locked up SIM cards. 
Know Before you Start
  • When mapping we hold the device at a 45–90-degree angle and only scan for a maximum of 2m at a time  
  • It is suggested you use Groundhawk to document with photos the route before and after the buildout. This should be done in “Point mode”.
  • Routes: there is a trench route and a surface route – you can choose between the two when starting to map a specific trench  
  • Satellite Connection Status: there is a colored dot on the top row – this shows the validity of the satellite connection  
  • Cable Selection: use this tool to choose which cable type and protection type you have in the trench that is being recorded – remember to change this selection when the cable or protection type changes  
  • Point/Menu: this tool is to be used during mapping when there is a specific type of point – for example manholes or distribution cabinets – there is a menu where you can choose predetermined points 

First Time Use

Select the topic from list and get ready to learn more.

1. Starting the Device and Application
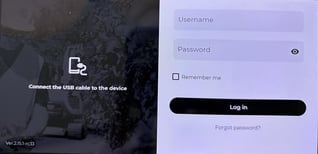
UI login
  • Start the device
    • Utilize your own SIM CARD PIN to unlock the sim card
    • We have sent you a pin code to unlock the GROUNDHAWK DEVICE
  • Open the Groundhawk application and login using your own Groundhawk credentials
2. Choosing a Site
Once logged in you can choose between an existing site or create a new site  
3. Satellite Connection

UI GNSS menu

When you start mapping, ensure the satellite connection signal is found and clear. To do that, find an open place nearby for a flawless connection.  


    • Connect the USB-C cable and wait for the satellite connection – if this takes over 2 minutes please try from a different location as trees and buildings can interfere with the signal 
4. Before Mapping – Choose Correct Operating Mode

UI Mode menu

Here’s how: 

Click on the ‘mode-select’ symbol at the top left of the screen. Here we can choose the relevant mode for what we are mapping.  

  • For training purposes – choose ‘Trench Route’ 
5. Starting to Record
  • Make sure your satellite status is green (as stated above under satellite connection) 
  • Press ‘Play’ to start a recording 
6. Selecting the Cable/Protection Type

UI Cable menu

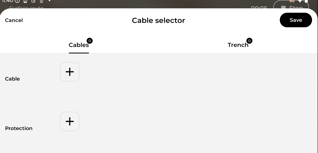
You define the cable type and protection type for one or up to 3 cables. This is done in the beginning of the mapping but also during mapping if cable or protection changes in the trench. 

Here's how to do it: 

1. Click ‘Cable selection’ symbol on the bottom of the screen. 

2. Choose the relevant cable and protection configuration from the list. For example, a mid-voltage cable in a protective duct. 

7. Point Mapping & Photos

Point mapping 

UI PointsCam

You will use the ‘Point mapping’ option when mapping cabinets or similar objects. There is an option for an individual point or a point in the trench: 

Individual Point: If you only want to map a single object, you should select POINT instead of TRENCH mode. 

Point in the Trench: If you want to map objects while you are mapping the trench as well, you can just press the point measurement during mapping and then continue mapping the rest of the trench without stopping.  

1. Select Point Mapping by clicking ‘Mode Selection’ symbol in the top left corner on the screen.

2. Now aim at the object. When the object is on your aim, click ‘Point Mapping’ symbol in the top right corner on the screen.

3. List of objects opens on your screen. Choose a relevant object from the list. 

UI feature menu

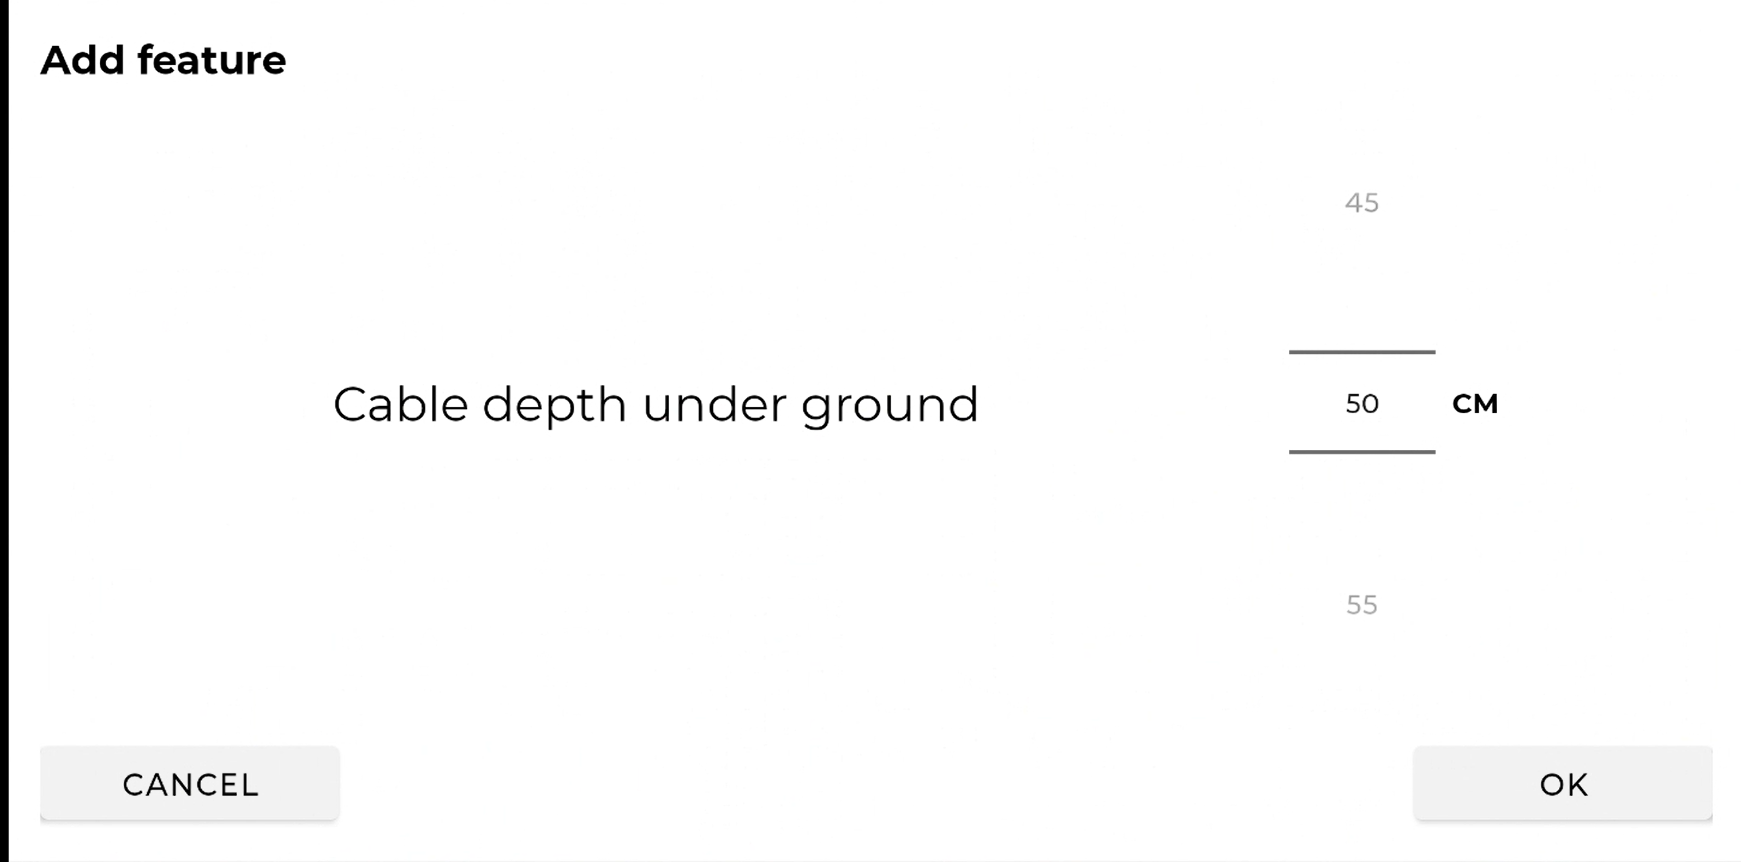
For objects that might need a description like a cabinet number, please enter that in the description box. 

Measured depth is only for providing manual depths like in case of trench being filled by water and user wants to give manually the depth at the location. 

Photos 

UI PointsCam

For every point that is mapped, Groundhawk automatically takes a photo and captures the exact location you are pointing at. 

In addition, it is recommended that during mapping you take 

  • 1-2 overall situational photos of the trench and its surrounds that you are mapping to provide overview photo 
  • Detailed photos of interesting points such as crossing infrastructure in the trench, contents of cabinets, etc. 
8. Mapping the Trench
  • Now we map the trench – walk along the trench with a steady slow pace scanning both the ground around the trench and the bottom of the trench 
  • Whenever the cable or protection type changes – click on the ‘Cable Selection’ tool to change it according to what you are mapping 
UI Cable sel


9. Ending the Recording
  • When we have reached the end point press ‘Stop’ 
UI StartStop
  • We can now upload the recordings to the portal 

Now you have completed the main steps from powering on the device all the way to ending a recording – Now we will go outside and try it for real 

What Would You Like to Learn Next?

Select the topic from list and get ready to learn more.


Welcome to learn more about Groundhawk!

This is a support page for all Groundhawk users. You will find all the relevant information that will make using Groundhawk efficient and easy in your daily work.

Welcome to learn more about Groundhawk!

Surf through role-based guidance, technical instructions and training material to master your Groundhawk Certification.

Welcome to learn more about Groundhawk!

Surf through role-based guidance, technical instructions and training material to master your Groundhawk Certification.

Role-based guidance

Technical instructions

Training & Certificate

Contact

Other

What to do next?

Surf through role-based guidance, technical instructions and training material to master your Groundhawk Certification.

Get to know Groundhawk

What is it all about?

  • What is Groundhawk?

  • How to work with Groundhawk on the field?

  • How to connect GPS connection smoothly?

  • How to add users to sites?

Role-based guidance

What's in it for me?

  • How to use Groundhawk to improve quality?

  • Why training is important and how to instruct users?

  • What kind of possibilities for integrations, formats and configuration?

Role-based guidance

What's in it for me?

  • How to use Groundhawk to improve quality?

  • Why training is important and how to instruct users?

  • What kind of possibilities for integrations, formats and configuration?

Technical instructions

How to use it right?

  • How to start using Groundhawk?

  • How to work with Groundhawk on the field?

  • How to connect GPS connection smoothly?

  • How to add users to sites?

Questions about Groundhawk?

Ask away, we'd love to help - Send us your message and we will get back to you as soon as possible.
  • Save on measurement costs

  • Speed up the completion of contracts

  • Fulfill the required measurement accuracy

  • Ensure the quality with image data

  • Reduce the risk for human errors

Welcome to learn more about Groundhawk!

This is a support page for all Groundhawk users. You will find all the relevant information that will make using Groundhawk efficient and easy in your daily work.